Single sign-on authentication
The Stadium Application Manager enables you to set up Single sign-on Authentication details for your deployed applications.
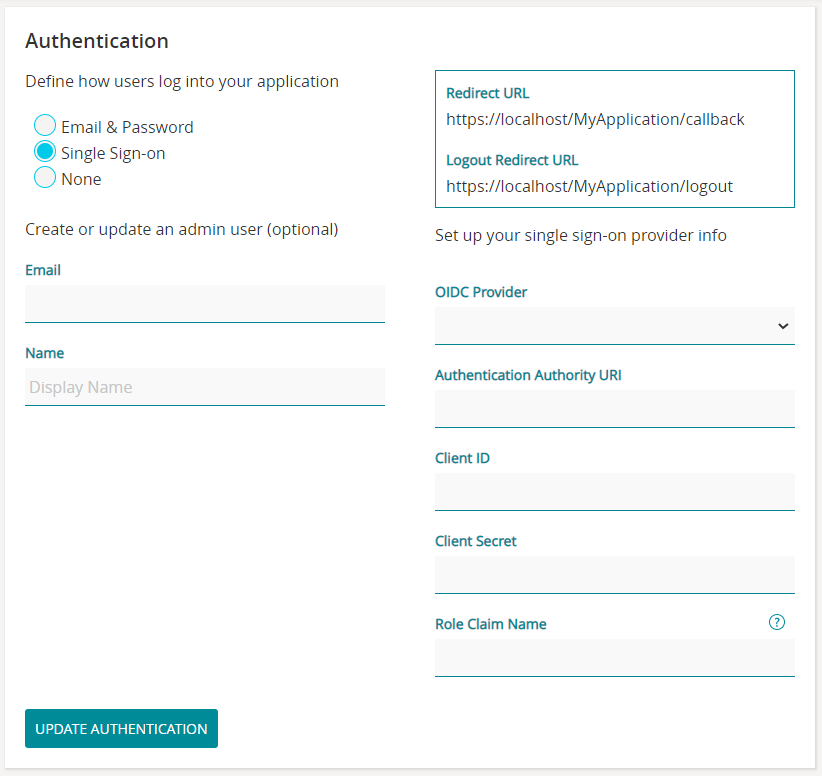
- Enter an administrator Email and Name. The email address must be registered with your Authentication service provider.
- Take note of the following details that are provided by Stadium, which will be required by your Authentication service provider:
- Redirect URL
- Logout Redirect URL
- Select your OIDC Provider (i.e. Authentication service provider):
- The following fields must be completed with the details that you will obtain from your Authentication service provider:
- Domain (only AuthO and Okta)
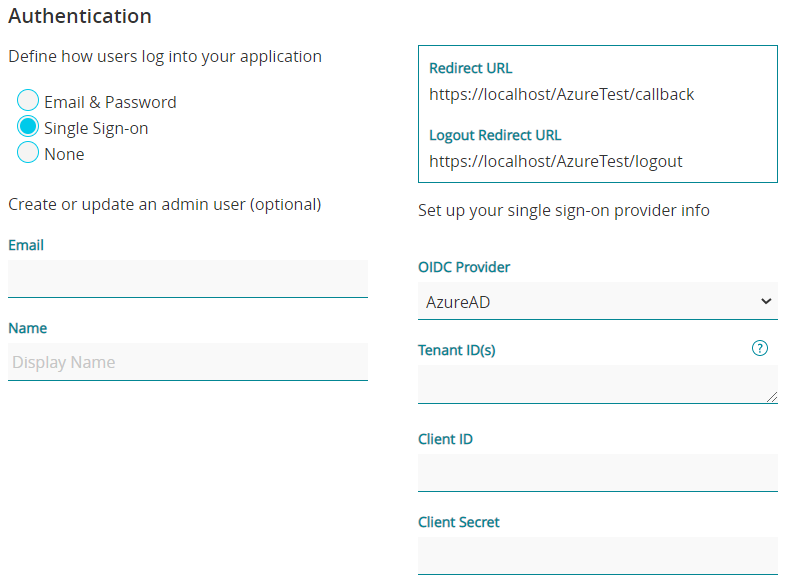
- Client ID
- Client Secret
- API Resource Name (only Generic Provider)
- API Resource Secret (only Generic Provider)
- Role Claim Name (only AuthO and Okta)
- Tenant ID (only Azure AD)
- Audience (only Generic Provider)
- Scopes (only Generic Provider)
When using Auth0
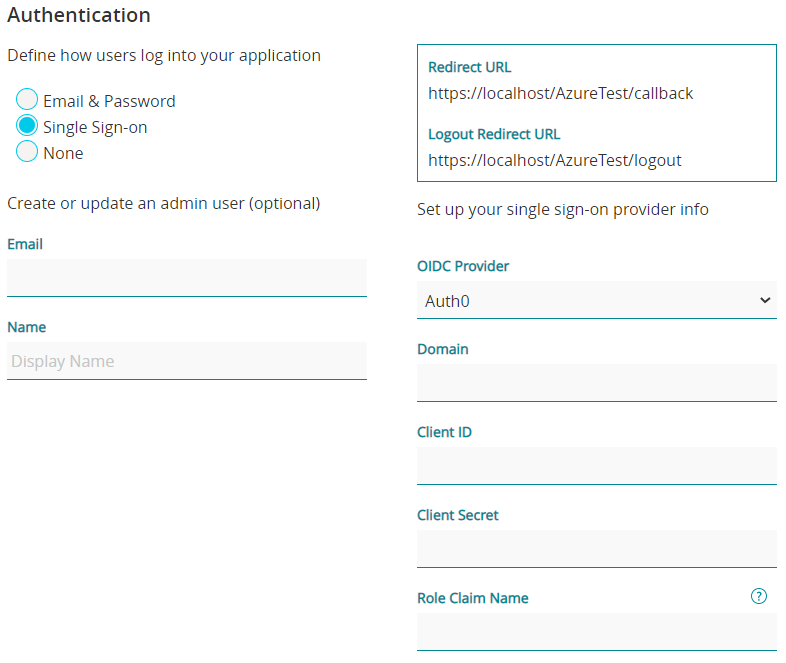
- Select Auth0 as your OIDC Provider.
- Go to auth0.com.
- Under Applications > Applications, click on Create Application
- In the Create application popup, under Choose an application type, select Single Page Web Applications
- Under the application Settings
- Under Application URIs:
- set Allowed Callback URIs to https://localhost/{webAppName}/callback
- set Allowed Logout URIs to https://localhost/{webAppName}/logout
- set Allowed Web Origins to https://localhost/{webAppName}
When using Okta

- Select Okta as your OIDC Provider.
- Register an account on okta.com
- Under Applications > Applications, click on Create App Integration In the Create a new app integration popup:
- Under Sign-in method, choose OIDC - OpenId Connect
- Under Application type, choose Single-Page Application
- On the New Single-Page App Integration, ensure the following settings:
- Grant type, check only Authorization Code
- Sign-in redirect URIs, https://localhost/{webAppName}/callback
- Sign-out redirect URIs, https://localhost/{webAppName}/logout
- Under Directory > People:
- Select the user whose email was used during deployment
- Click on Assign Applications
- For the respective application, click on Assign
- Click on Save and Go Back, Done
To set up groups in Okta:
- Under Directory > Groups, add and assign a group to People and/or Apps
- Under Security > API, select the relevant Authorization Server (e.g.: default)
- In the Claims tab, add a new claim for the roles (a.k.a. groups):
- Name: value corresponding to the role claim name entered during the Stadium app deployment
- Include in token type: ID Token; Always
- Value type: Groups
- Filter: Matches regex; .* (or any other desired filter)
- Include in: Any scope
When using Microsoft Entra ID
Start setting up the application in MS Entra ID:
- Sign in to the Azure Portal and navigate to Microsoft Entra ID.
- Under App Registrations, click New Registration
- Enter a name
- Select the Account Types
- Click Register (You can ignore the Redirect URI section for now.)
- Keep the page open as it contains info that you will need later on.
In Stadium:
- Select MS Entra ID as your OIDC Provider.
- Take note of the Redirect URL and Logout URL. These values will be used in the last step when finishing the registration in MS Entra ID.
- Enter the relevant details obtained from MS Entra ID (see the page you left open):
- Directory (Tenant) ID('s) - add a single tenant or a list of tenants, separated by commas
- Client ID
- Navigate to Manage > Authentication
- Click 'Add a platform' and select 'Single-page application'
- Set the Redirect URI (See In Stadium - step 2)
- Set the Front-channel logout URL (See In Stadium - step 2)
For detailed steps on the Azure AD setup, go here.
When using the Generic Provider

- Select <Generic Provider> as your OIDC Provider.
- Sign in to the relevant Authentication service provider's portal, e.g. console.developers.google.com for Google authentication.
- Complete the necessary app registration steps on your provider's portal, providing the required details you receive from Stadium, e.g. Redirect URL and Logout Redirect URL,
as well as retrieving the details from the provider that you have to enter on Stadium, including:
- Client ID
- API Resource Name
- API Resource Secret
- Audience
- Scopes